
Оригинал процедуры на русском языке находится здесь: Краткое руководство по работе с модулем Requisition Management (Требования)
Please pay attention: this version of user procedure has been modified, new version (sorry, in Russion only) located here: /procedures/requisition-management-new-scenario-modified/
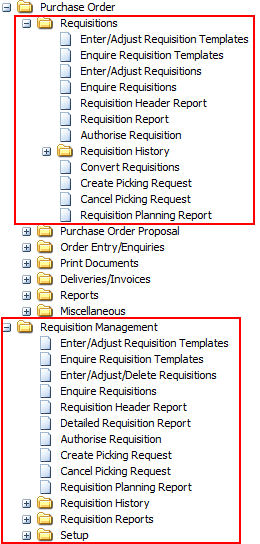 You can have different menu items (depends on your role). In one case you will see «Requisition Management» menu, in other case – submenu «Requisitions» from parent menu «Purchase Order».
In this quick user guide the following processes are described:
1. Enter Purchase Requisition (Requisition type 1)
2. Enter Material Requisition (Requisition type 2 – Stock transfer from main warehouse to department’s warehouse)
3. Enter Material Requisition (Requisition type 5 – Stock Issue from main warehouse directly to department’s cost account without Stock Transfer)
4. Enter Requisition (Requisition type 0 – Purchase request of Items absent in Stock Items List)
5. Authorize Requisition
6. Convert Requisition into Purchase Order, Stock Transfer or Stock Issue
7. Print additional «external» reports located in Reporting Server of iScala.
8. Enter Requisition Template
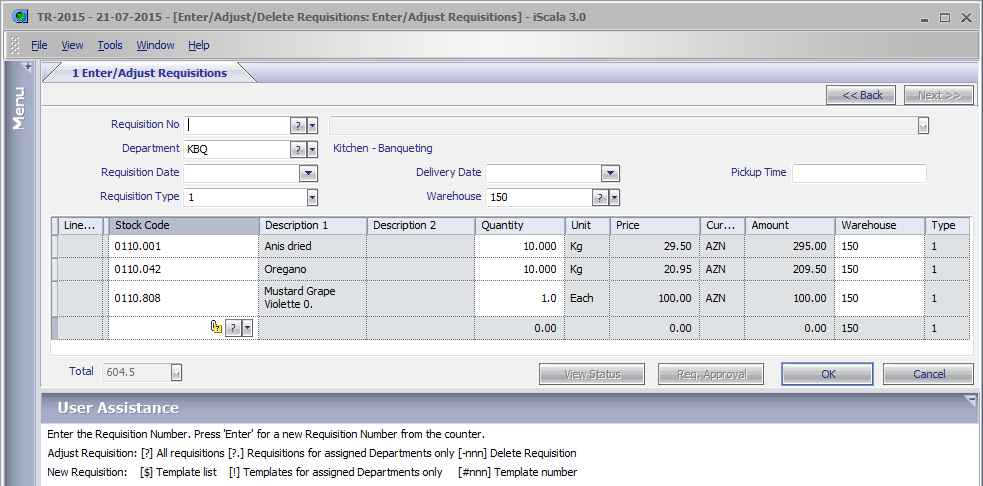
1. Enter Purchase Requisition (Requisition type 1)
Menu path:
Requisition Management -> Enter/Adjust/Delete Requisitions
or
Purchase Order -> Requisitions -> Enter/Adjust Requisitions
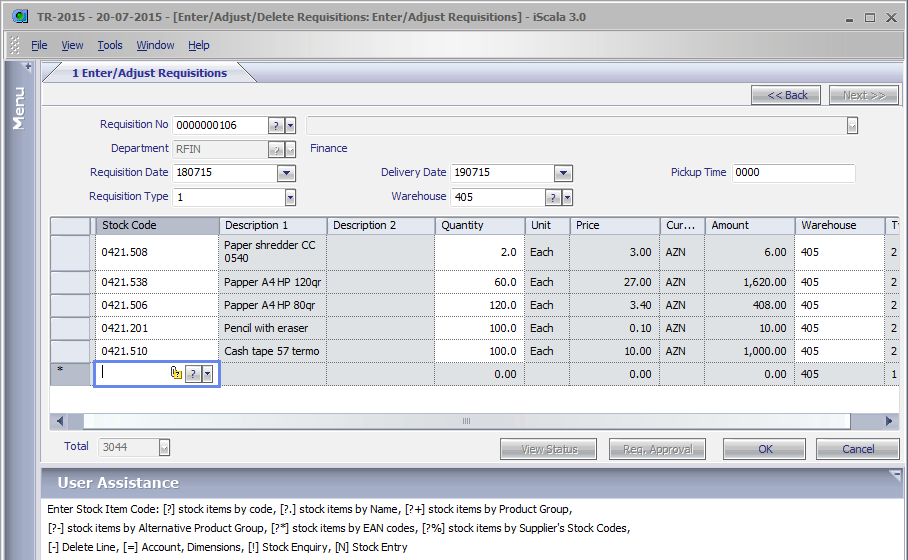
Requisition No: If you enter new Requisition, just press «Enter». iScala will automatically set new Requisition Number.
Department: Press «F4» button and select your department from the list.
Requisition Date: Requisition creation date. Don’t adjust.
Delivery Date: Expected Delivery Date.
Pickup Time: Delivery time. Not used, don’t adjust.
Requisition Type: (important!) – 1 (Purchase Requisition (will be converted into Purchase Order)).
Warehouse: press «F4» button and select warehouse from the list, where you are going to receive purchased items.
Stock Code: there are different choices to get needed items in this list: «F4» — full stock items list in Stock Items code order, «?03» — stock items list in Stock Items code order, started from 03 (tobacco), «?.paper» — stock items list in Stock Items description order, started from «paper». Additional Snap Search option can be used: To find stock item use «@» and any part of Stock Item long description, for example «@BITKI CAYI» to find «AZERCAY BITKI CAYI (TARCIN VE MIXEC) 25 LI» and press «Enter»
Additional window will be shown:

«StockBalanceAllWHs» field in this window shows quantity for all existing warehouses. Select needed item in the list and press «Enter» or click on «OK» button.
Next window will be shown. Previously selected Stock Item will be selected and quantities for Requisition warehouse will be shown:

Press «Enter» or click on «OK» button and you will return to Enter Requisition lines screen.
Quantity: Enter requested quantity.
When first requisition line entry is complete repeat entry of second line from the field «Stock Code» and etc.
When requisition lines entry is finished press «ОК» button
You will see:

Remember entered Requisition Number and press «Yes».
Screen form will be cleared and cursor returns back to the «Requisition No» field. If you need to enter another Requisition then Enter it otherwise, press «Esc» button to return to the menu. Please always do it if you are not going to continue to enter Requisitions.
2. Enter Material Requisition (Requisition type 2 – Stock transfer from main warehouse to department’s warehouse)
Menu path:
Requisition Management -> Enter/Adjust/Delete Requisitions
or
Purchase Order -> Requisitions -> Enter/Adjust Requisitions
Requisition No: If you enter new Requisition, just press «Enter». iScala will automatically set new Requisition Number.
Department: Press «F4» button and select your department from the list.
Requisition Date: Requisition creation date. Don’t adjust.
Delivery Date: Expected Delivery Date.
Pickup Time: Delivery time. Not used, don’t adjust.
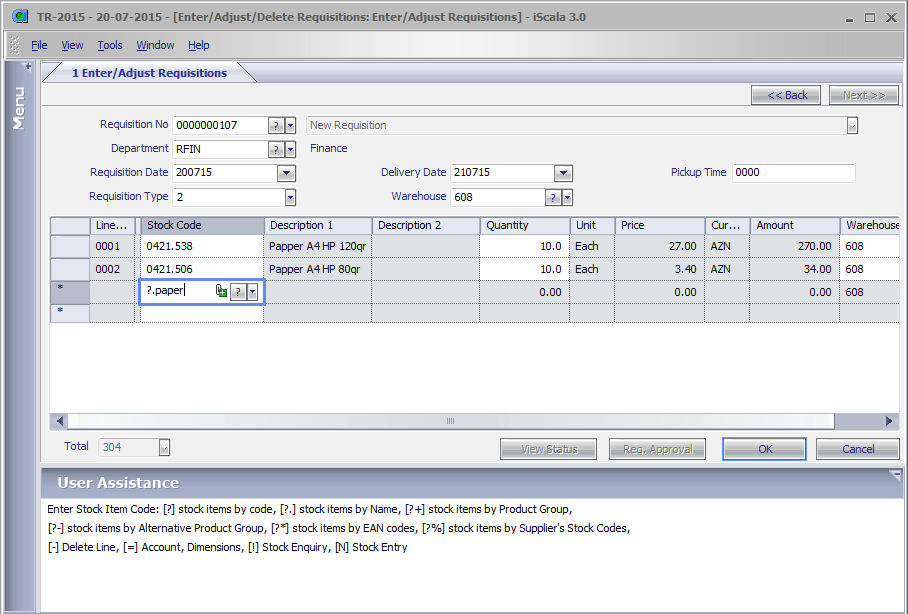
Requisition Type: (important!) – 2 (Material Requisition (will be converted into Stock Transfer)).
Warehouse: press «F4» button and select warehouse from the list, where FROM you are going to receive transferred items. Please Pay attention: issue and receiving warehouses should be different!
Stock Code: there are different choices to get needed items in this list: «F4» — full stock items list in Stock Items code order, «?03» — stock items list in Stock Items code order, started from 03 (tobacco), «?.paper» — stock items list in Stock Items description order, started from «paper».
Note: Please select Stock Items in accordance to Warehouse, for example chose beverages if you selected warehouse «200 — Beverage Main», as there is no food or engineering items in this warehouse.
Quantity: Enter requested quantity.
When first requisition line entry is complete repeat entry of second line from the field «Stock Code» and etc.
When requisition lines entry is finished press «ОК» button
You will see:
Remember entered Requisition Number and press «Yes».
Screen form will be cleared and cursor returns back to the «Requisition No» field. If you need to enter another Requisition then Enter it otherwise, press «Esc» button to return to the menu. Please always do it if you are not going to continue to enter Requisitions.
3. Enter Material Requisition (Requisition type 5 – Stock Issue from main warehouse directly to department’s cost account without Stock Transfer)
Menu path:
Requisition Management -> Enter/Adjust/Delete Requisitions
or
Purchase Order -> Requisitions -> Enter/Adjust Requisitions
Requisition No: If you enter new Requisition, just press «Enter». iScala will automatically set new Requisition Number.
Department: Press «F4» button and select your department from the list.
Requisition Date: Requisition creation date. Don’t adjust.
Delivery Date: Expected Delivery Date.
Pickup Time: Delivery time. Not used, don’t adjust.
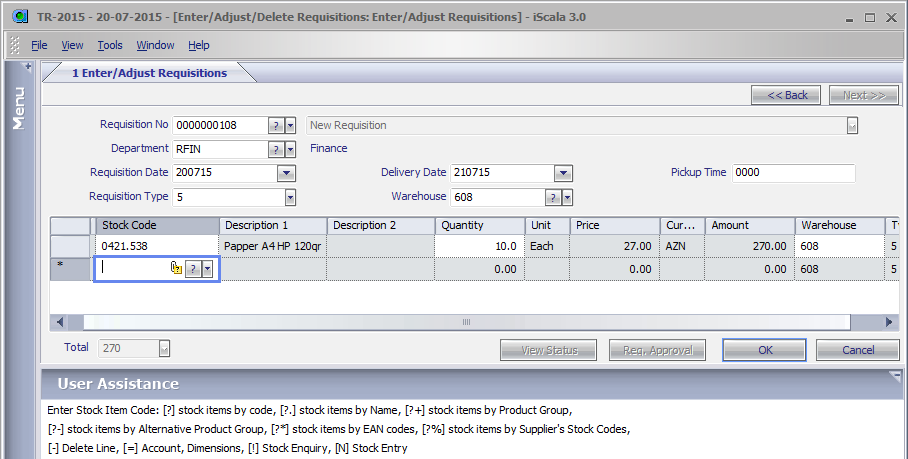
Requisition Type: (important!) – 5 (Material Requisition (will be converted into Stock Issue)).
Warehouse: press «F4» button and select warehouse from the list, where FROM you are going to receive issued items.
Stock Code: there are different choices to get needed items in this list: «F4» — full stock items list in Stock Items code order, «?03» — stock items list in Stock Items code order, started from 03 (tobacco), «?.paper» — stock items list in Stock Items description order, started from «paper».
Note: Please select Stock Items in accordance to Warehouse, for example chose beverages if you selected warehouse «200 — Beverage Main», as there is no food or engineering items in this warehouse.
Quantity: Enter requested quantity.
When first requisition line entry is complete repeat entry of second line from the field «Stock Code» and etc.
When requisition lines entry is finished press «ОК» button
You will see:
Remember entered Requisition Number and press «Yes».
Screen form will be cleared and cursor returns back to the «Requisition No» field. If you need to enter another Requisition then Enter it otherwise, press «Esc» button to return to the menu. Please always do it if you are not going to continue to enter Requisitions.
Enter Requisition of type 0.
Menu path:
Requisition Management -> Enter/Adjust/Delete Requisitions
or
Purchase Order -> Requisitions -> Enter/Adjust Requisitions
Please use this type of Requisition only when you need to purchase something missing in Stock Items list and this item have never been purchased before!
Requisition No: If you enter new Requisition, just press «Enter». iScala will automatically set new Requisition Number.
Department: Press «F4» button and select your department from the list.
Requisition Date: Requisition creation date. Don’t adjust.
Delivery Date: Expected Delivery Date.
Pickup Time: Delivery time. Not used, don’t adjust.
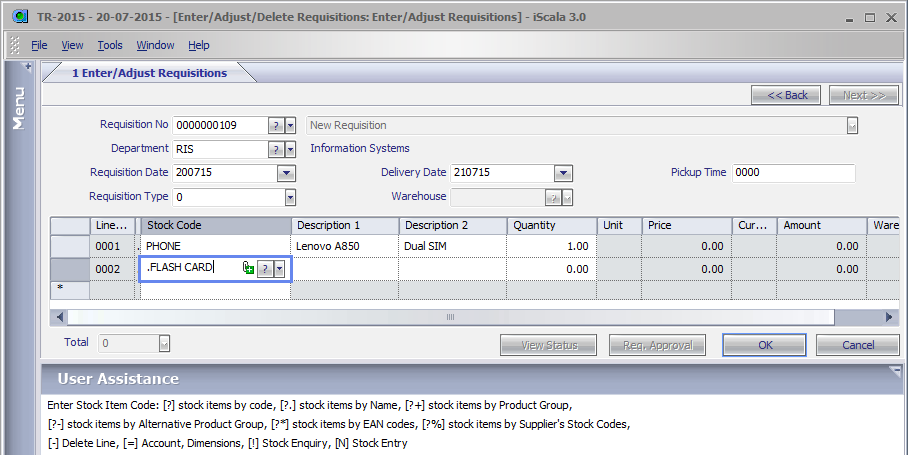
Requisition Type: (important!) – 0 (Undefined).
Stock Code: Enter «.» (dot) and one word description of requested item, for example, «.phone». Press «Enter»
Description 1: Enter first part of description of requested item, for example «Lenovo A850». Press «Enter»
Description 2: Enter second part of description of requested item, for example, «Dual SIM». Press «Enter»
Quantity: Enter requested quantity.
When first requisition line entry is complete repeat entry of second line from the field «Stock Code» and etc.
When requisition lines entry is finished press «ОК» button
You will see:
Remember entered Requisition Number and press «Yes».
Screen form will be cleared and cursor returns back to the «Requisition No» field. If you need to enter another Requisition then Enter it otherwise, press «Esc» button to return to the menu. Please always do it if you are not going to continue to enter Requisitions.
5. Authorise Requisition.
Menu path:
Requisition Management -> Authorise Requisition
or
Purchase Order -> Requisitions -> Authorise Requisition
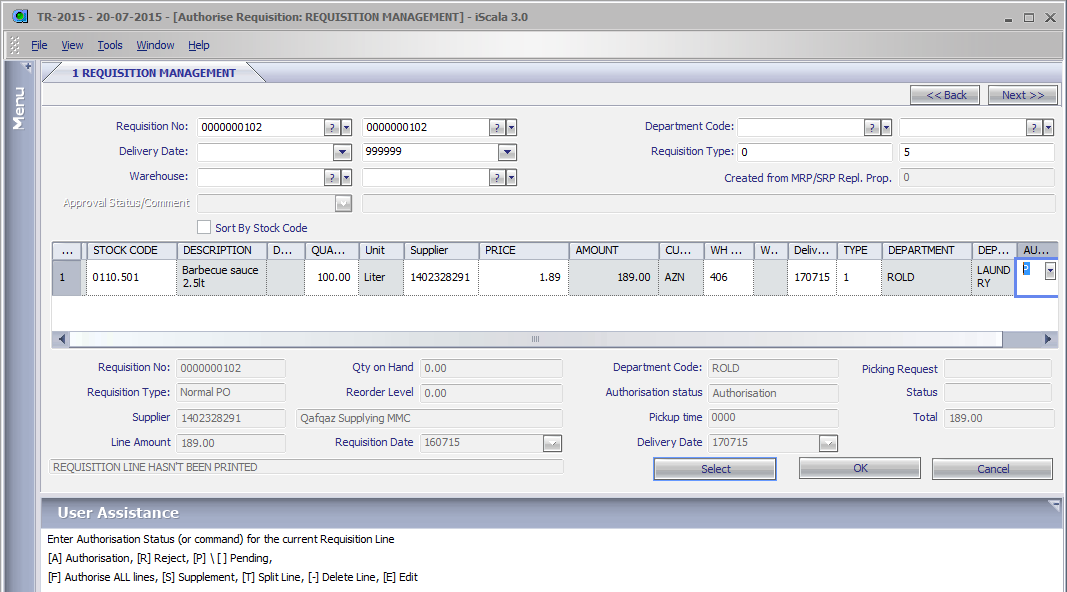
Requisition No: Enter Requisition Number manually or select from the list («F4»).
Don’t fill any other filed, just press «Select» button.
Go to the last field of the line «AUTHORISATION». To authorize line, type «A», to authorize all lines –«F». To reject line, type «R», to delete line type «-» (dash). To split line into 2 (for example in case when existing quantity less the necessary), type «T». Then press «Enter»
Press «ОК». You will see:
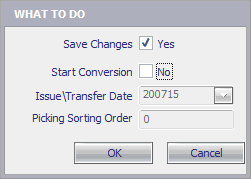
Please make sure that «Start Conversion» checkbox is not checked (UNCHECK IT!). Press «ОК»
Screen form will be cleared and cursor returns back to the «Requisition No» field. If you need to authorize another Requisition then do it otherwise, press «Esc» button to return to the menu. Please always do it if you are not going to continue to Authorize Requisitions.
6. Convert Requisition into Purchase Order, Stock Transfer or Stock Issue
Menu path:
Requisition Management -> Authorise Requisition
or
Purchase Order -> Requisitions -> Authorise Requisition
Requisition No: Enter Requisition Number manually or select from the list («F4»).
Don’t fill any other filed, just press «Select» button.
Go to the last field of the line «AUTHORISATION». To authorize line, type «A», to authorize all lines –«F». To reject line, type «R», to delete line type «-» (dash). To split line into 2 (for example in case when existing quantity less the necessary), type «T». Then press «Enter»
Difference between this and previous procedures the following: You need to make sure that for requisition of type 1 supplier code fields are filled in and purchase prices are not 0. For Requisition types 2 and 5 Quantity On Hand is equal or more than requested. If you are going to convert lines do not meet these conditions, you will get an error message. In addition, you may need to change the delivery date unless delivery date, a smaller current
Press «ОК». You will see:
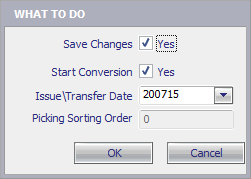
Please make sure that «Start Conversion» checkbox is checked. Press «ОК»
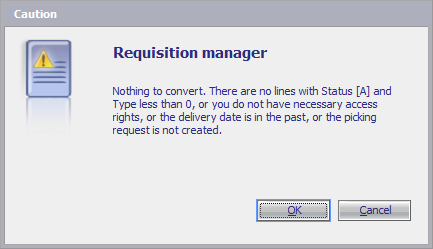
If you get error message then go back, correct the error, and then repeat the process.
You can see in the picture on the left error message due to the fact that the expected delivery date has already passed. You need to change the delivery date, setting it at least today’s date.
Depending on the type of Requisition you will get the message about creating Purchase Order or you will be prompted to print the internal delivery note movement between warehouses.
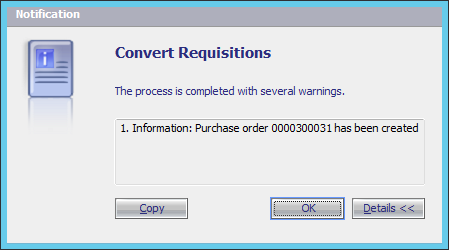
Press «ОК». Screen form will be cleared and cursor returns back to the «Requisition No» field. If you need to convert another Requisition then do it otherwise, press «Esc» button to return to the menu. Please always do it if you are not going to continue to convert Requisitions.
7. Print additional «external» reports located in Reporting Server of iScala.
Additional reports have been added into iScala menu

Click on Report Name, for example, Requisition Details Report:
Select Department, Requisition Number and press «View report» button:
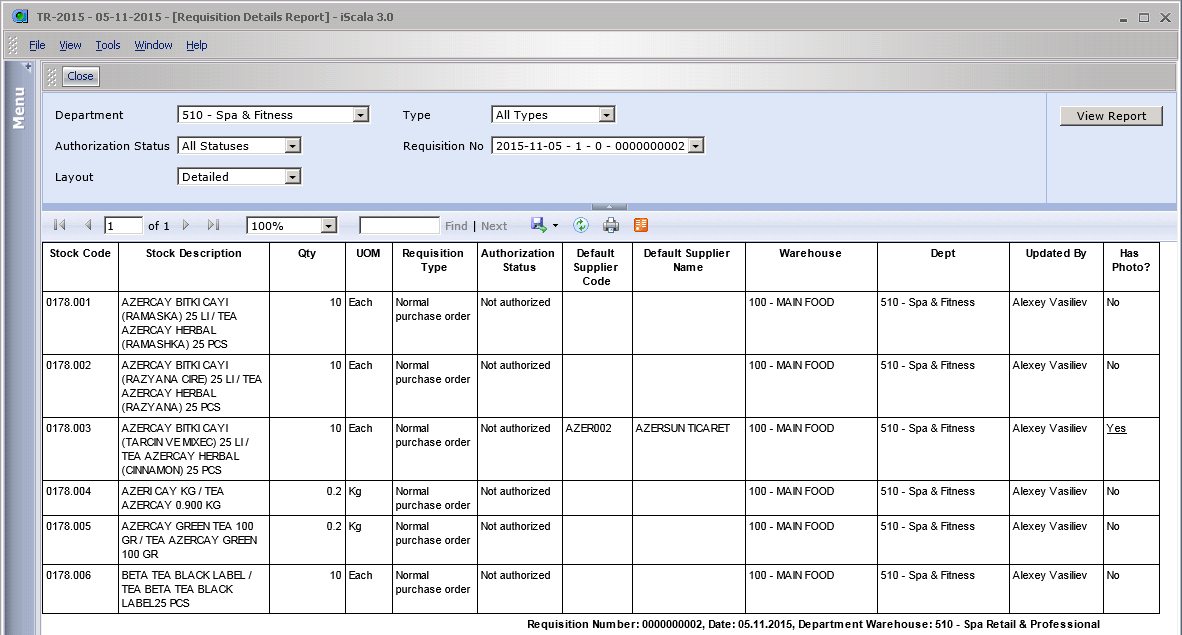
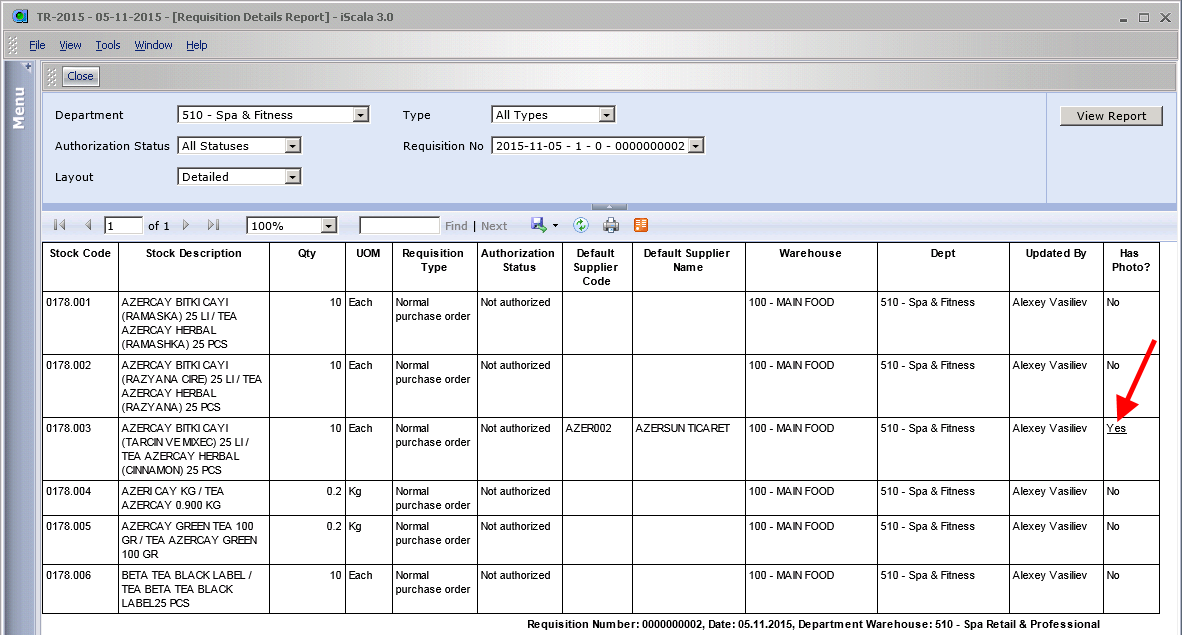
It shows Requisition content, authorization status for each line and availability of image linked to Stock Item Code in iScala. For example, for line number 3 we can see that field «Has Photo?» value is equal to «Yes». In this case we are able to see it. Click on «Yes»:
 You will redirect to separate report where you can see the picture:

To return back press «Backspace» button
This report also can be viewed in compressed layout and exported into Excel to send request to suppliers:
 Save or Open exported file.
Inventory Movement Form
This document shows only authorized requisitions of type 2 or type 5. Select Department and Requisition Number and press «View report» button:

It should be printed before Stock Movement/Issue from warehouse.
Please pay attention: for requisition of type 2 issue and receiving warehouses should be different, otherwise stock transfer has no sense (in this case «From» and «To» fields in the report are marked red font color):

8. Enter Requisition Templates
Menu path:
Requisition Management -> Enter/Adjust Requisition Templates
or
Purchase Order -> Requisitions -> Enter/Adjust Requisition Templates
You can enter Requisition Template the same way as Requisition. The only difference is in Template Name:
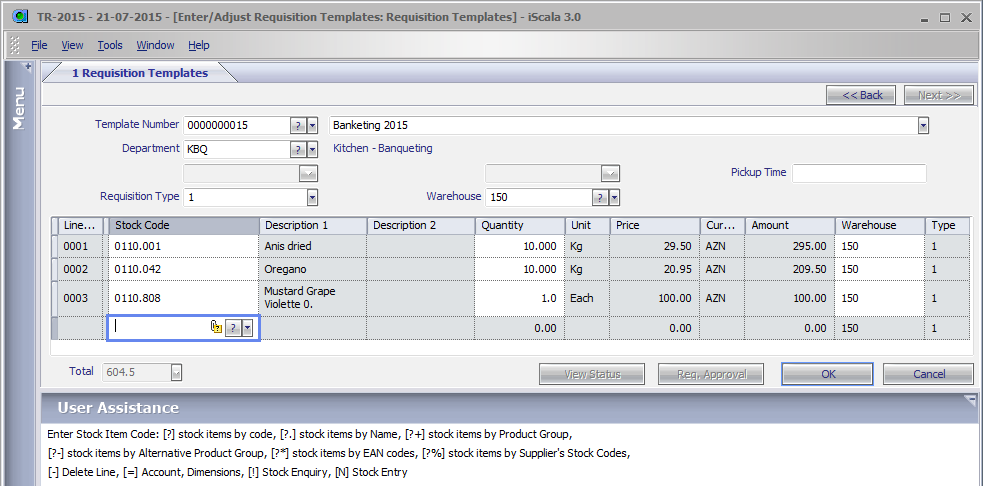
Please fill Template Name so that you can easily select it in a large list of templates (Field «Name» to the right of the Template number, in the picture above the template name is «Banketing 2015»).
When requisition template lines entry is finished press «ОК» button
You will see:
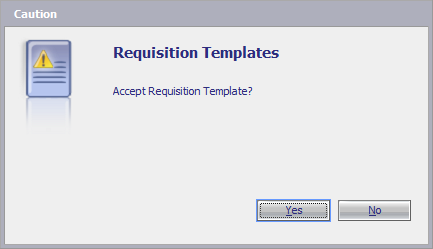
Press «Yes».
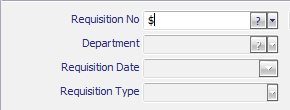
On Requisition Entry you can select Template by typing «$» (dollar) and press «Enter». Select Template:
You will see:
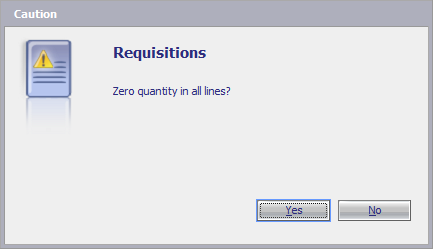
Press «Yes» if you would like to enter quantities in Requisition lines manually. Press «No» if you would like to fill quantities from template.
When you press any key requisition will be prefilled except Requisition No, Requisition Date and Delivery date fields:
To get new Requisition Number just press «Enter». iScala will automatically set new Requisition Number. Then fill in «Requisition Date», «Delivery Date», «Pickup Time» fields. Adjust Quantities if necessary. Use standard way to save Requisition (described at the top of this quick user guide).


